Are you ready to dive into a dessert that’s as simple as it is decadent? The Oreo Icebox Cake is the perfect no-bake treat to impress friends and family. In this post, I’ll reveal the essential ingredients, easy steps to make it, and ways to give it a fun twist. Whether you’re a baking novice or a pro, this creamy dessert will satisfy your cravings and become a crowd favorite. Let’s get started!
What Are the Key Ingredients for Oreo Icebox Cake?
What Are the Essential Ingredients for This Dessert?
The Oreo Icebox Cake relies on some simple yet key ingredients. You need two packages of Oreo cookies, heavy whipping cream, powdered sugar, vanilla extract, cream cheese, and milk. These items create a dessert that is rich and creamy. The Oreos give a nice crunch and chocolate flavor. The cream cheese adds a smoothness that balances it all.
How Do These Ingredients Contribute to the Flavor?
Each ingredient plays an important role in the flavor. Oreos bring that classic chocolatey taste and a slight crunch. The heavy cream adds a fluffy texture that makes each bite melt in your mouth. The powdered sugar sweetens the filling without overpowering the Oreos. Vanilla extract gives a warm flavor, making it feel special. Cream cheese adds richness and a hint of tang. Finally, milk helps soften the Oreos, making layers blend beautifully.
Are There Any Substitutions for Special Diets?
Yes, you can make substitutions for this dessert. For a dairy-free option, use coconut cream instead of heavy cream and a dairy-free cream cheese. You can also use gluten-free Oreos if you need a gluten-free dessert. If you want a lower-sugar version, use a sugar substitute in place of powdered sugar. These changes keep the dessert tasty while fitting different diets.
For the full recipe, check the details shared earlier.
How Do You Make Oreo Icebox Cake?
To make Oreo icebox cake, you need just a few simple steps. This no-bake dessert is perfect for any occasion.
What Are the Step-by-Step Instructions?
1. Prepare the Cream: First, beat 2 cups of heavy whipping cream in a bowl. Use an electric mixer on high speed until you see soft peaks. Gradually mix in 1 cup of powdered sugar and 1 teaspoon of vanilla extract. Keep beating until you have stiff peaks. Set this aside.
2. Mix Cream Cheese: In another bowl, beat 1 cup of softened cream cheese until it is smooth. Slowly add 1/2 cup of milk while mixing until it is creamy and lump-free.
3. Combine Mixtures: Now, fold the whipped cream into the cream cheese mixture until it is fully combined and smooth. This creamy mix becomes the filling for the cake.
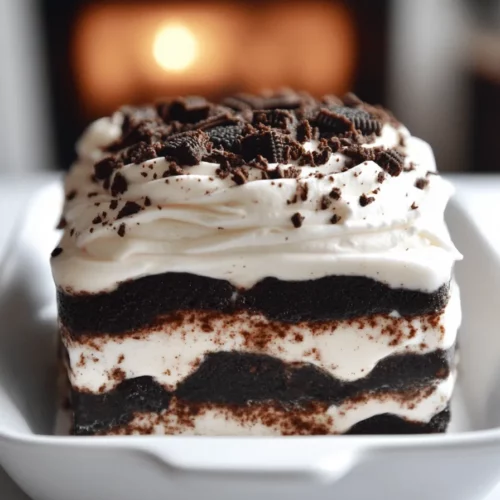
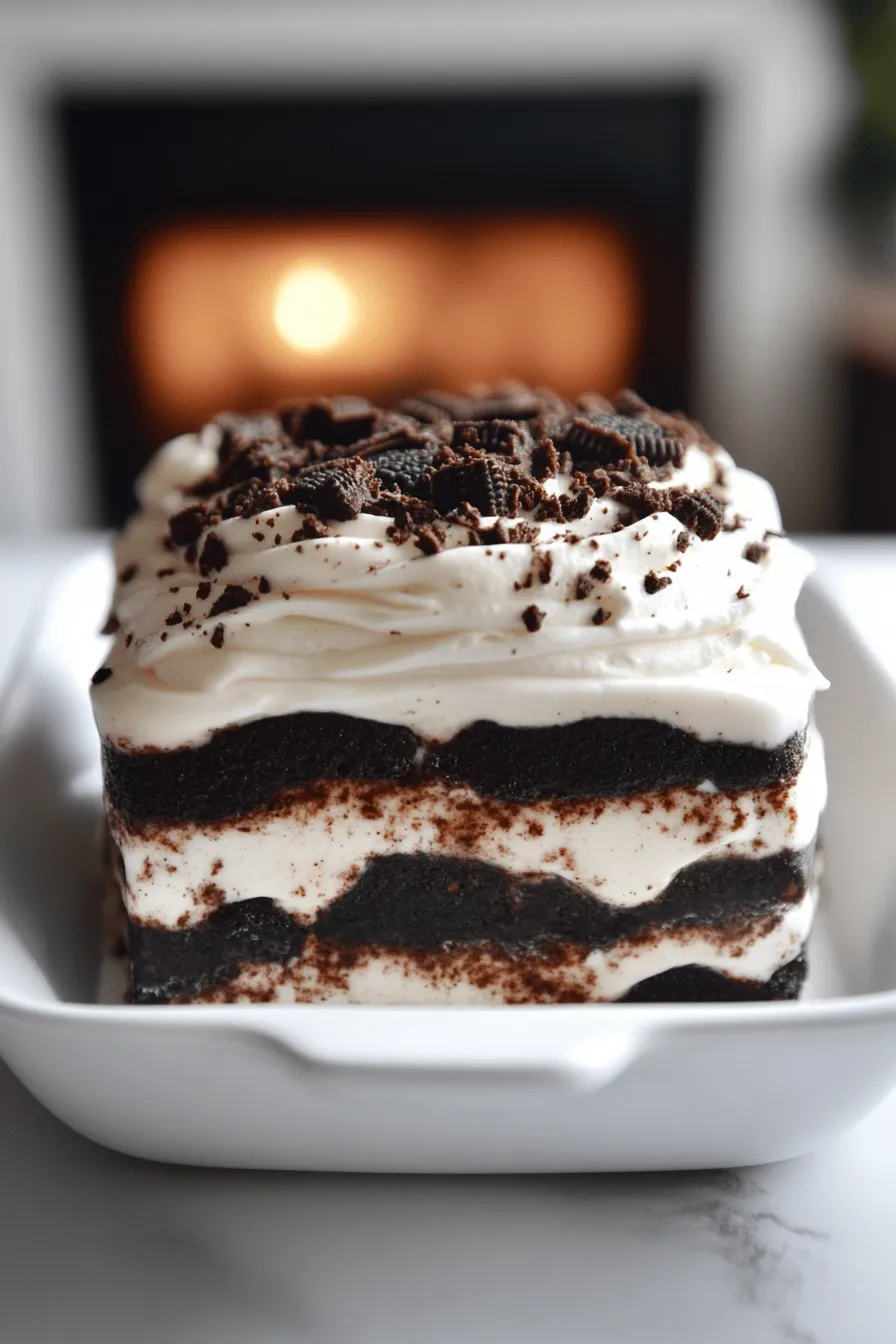
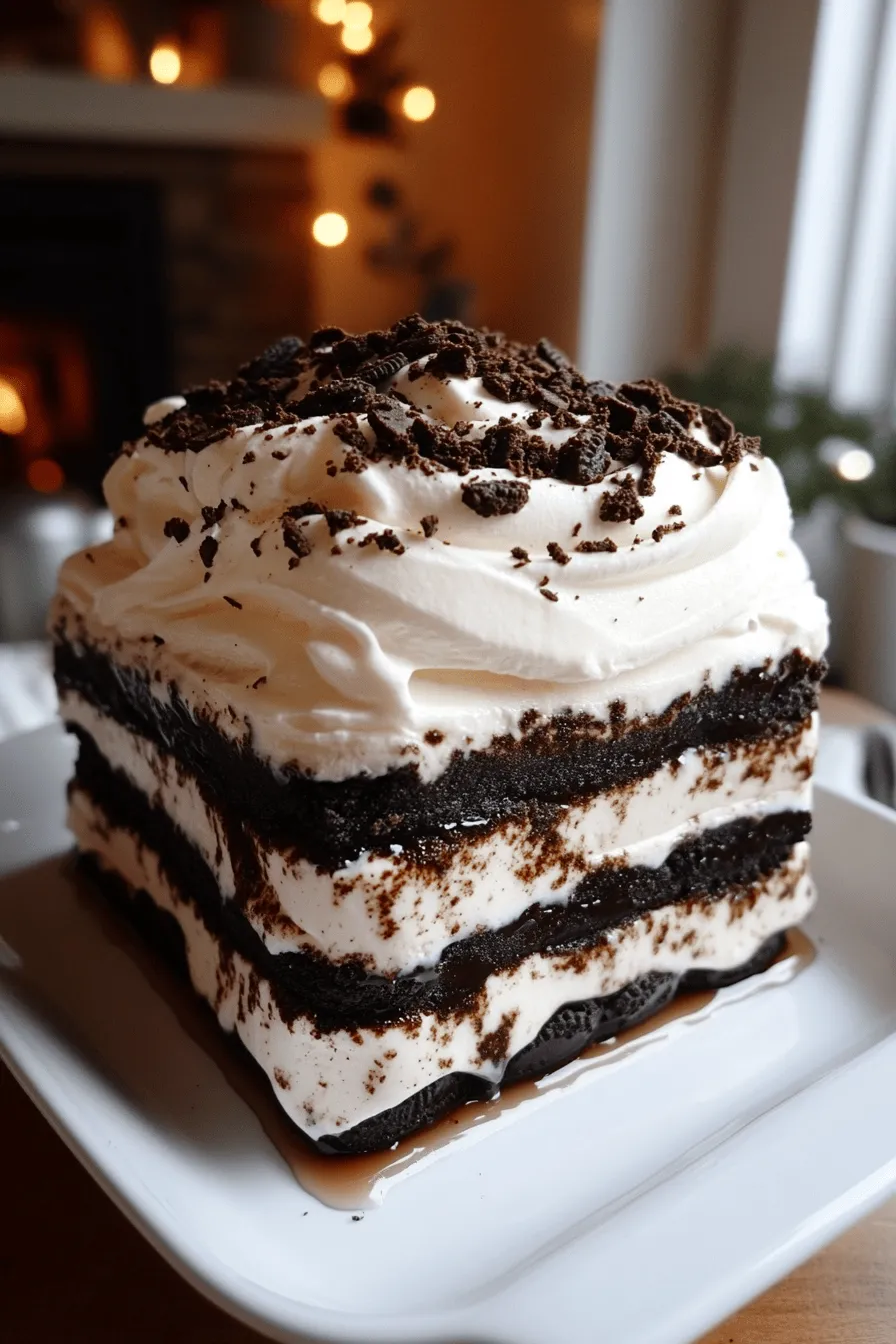
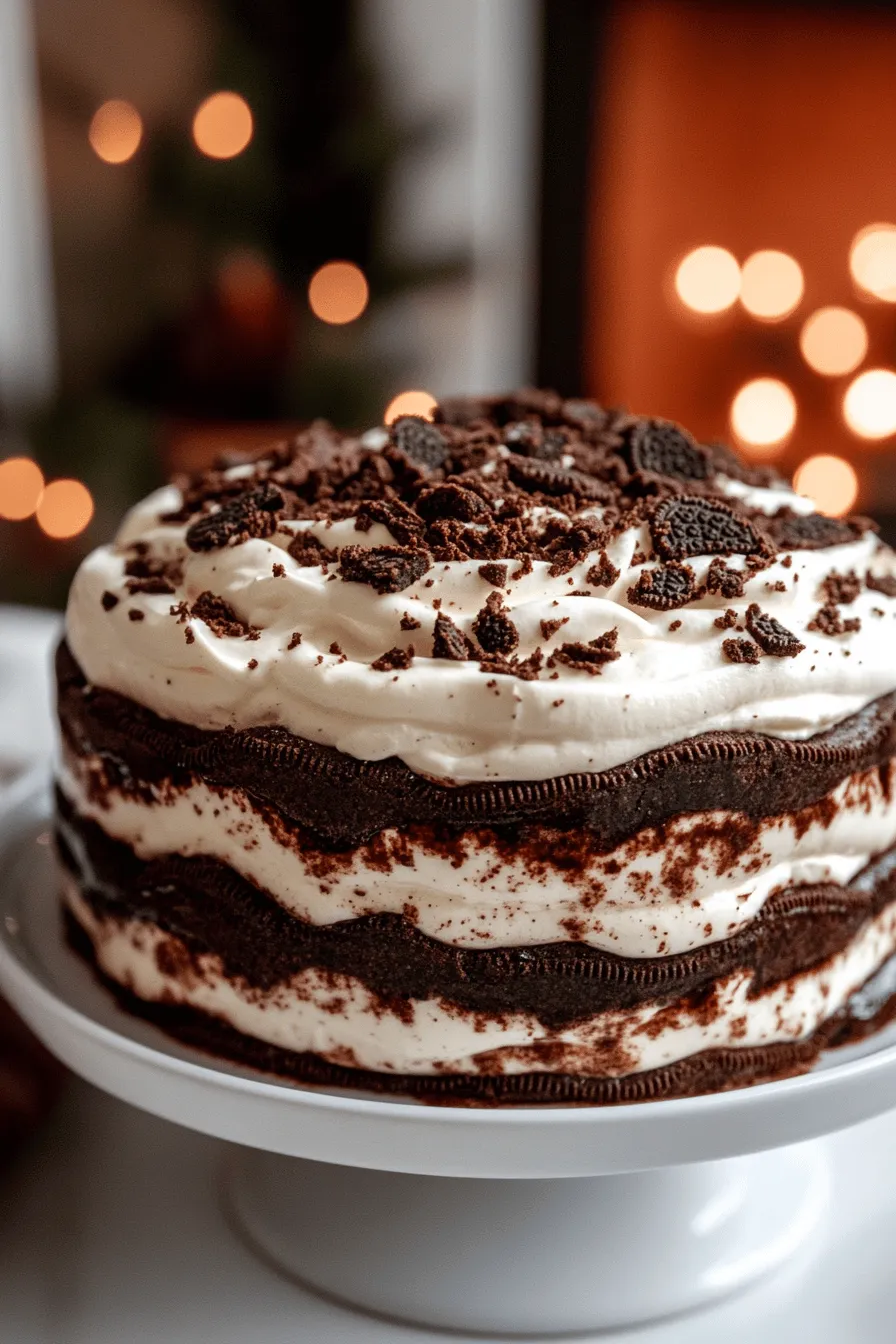
4. Layer the Cake: Take a 9×13-inch baking dish. Start with a layer of Oreo cookies at the bottom. Quickly dip each cookie in milk. This softens them just right.
5. Add Filling: Spread a layer of the cream filling over the Oreos. Smooth it out evenly. Repeat this process with more dipped Oreos and filling. You can layer until you reach about four layers, ending with the cream filling on top.
6. Chill: Cover the dish with plastic wrap and refrigerate for at least 4 hours, or overnight for best results. This chilling time helps the Oreos soften and the flavors mix well.
7. Serve: After chilling, cut the cake into squares. You can garnish with chocolate shavings or crushed Oreos on top for extra flair.
How Long Does It Take to Prepare?
The prep time is about 30 minutes. After that, you need to chill the cake for 4 hours. If you want the best flavor, let it chill overnight.
What Are the Tips for Perfect Assembly?
To assemble the cake perfectly, make sure your cream is whipped well. It should hold stiff peaks. Dip the Oreos in milk quickly to avoid sogginess. When layering, spread the filling evenly to ensure every bite is creamy. Lastly, let it chill long enough; this step is key to a smooth texture and great taste.
This simple dessert is a crowd-pleaser and a great addition to any meal. For the complete Oreo icebox cake recipe, check the Full Recipe.
What Are Some Creative Variations of Oreo Icebox Cake?
You can have fun with Oreo icebox cake by trying different flavors. One great idea is to add cream cheese. The cream cheese adds a rich taste that pairs well with the Oreos. Mixing in some peanut butter can also give your cake a delightful twist.
You can also change the layers. Instead of just Oreos, try using chocolate graham crackers. This swaps the flavor and adds a fun texture. For a fruity option, consider using fresh berries between the layers. Strawberries or raspberries can brighten up the cake and add a refreshing taste.
When it comes to modifying the recipe for special events, think about the season. For fall, add pumpkin spice to the cream. For summer, use lemon zest for a refreshing kick. You can even make it festive by adding colored sprinkles for birthdays or holidays.
Toppings can take your cake to the next level. Try adding crushed cookies on top for crunch. You could also drizzle chocolate syrup for a sweet touch. Whipped cream or fresh fruit can add color and flair to your dessert.
For those who love a cheesecake flavor, consider making an Oreo cheesecake icebox cake. Just mix in some extra cream cheese and sour cream into the filling. This adds a creamy, tangy taste that everyone will love.
With these Oreo icebox cake variations, you can create a dessert that fits any mood or occasion. The possibilities are endless! Don’t forget to check the Full Recipe for the base to get started.
How Do You Properly Store and Serve Oreo Icebox Cake?
To keep your Oreo icebox cake fresh, store it in the fridge. Use an airtight container or cover it tightly with plastic wrap. This keeps the cake moist and prevents it from absorbing other fridge smells. You can store it for up to five days.
When serving for special occasions, presentation is key. Cut the cake into neat squares. Place each piece on a colorful plate. Garnish with chocolate shavings or crushed Oreos for a nice touch. This makes each slice look tempting.
For potlucks, consider making a larger batch. You can easily double the recipe. Bring the cake in a disposable dish for easy transport. Add a label with the name and ingredients to help guests with allergies.
Some helpful serving suggestions include pairing the cake with fresh fruit. Berries, like strawberries or raspberries, add a bright flavor. You can also serve it with whipped cream or a scoop of vanilla ice cream. These additions create a delightful dessert experience.
Try to chill the cake overnight before serving. This allows the flavors to meld and makes it taste even better. Trust me, everyone will love this simple and decadent treat. For the full recipe, check out the earlier section.
What Feedback Do Others Have on Oreo Icebox Cake?
Many people rave about Oreo Icebox Cake. They love how easy it is to make. This dessert shines at parties and gatherings. It’s a rich dessert that brings smiles to chocolate lovers.
What Do People Love About This Dessert?
Folks enjoy the layers of cream and Oreos. They find the texture delightful and creamy. The chocolate flavor combines perfectly with the smooth cream. Many say it tastes like a dream. Some even call it their new favorite dessert.
Are There Any Notable Reviews or Tips from Experienced Bakers?
Experienced bakers share helpful tips. One tip is to use fresh Oreos for the best taste. Others suggest letting the cake chill overnight. This makes the flavors mix well. Some bakers recommend adding a sprinkle of salt for balance. This small touch can enhance the dessert’s richness.
What Makes It a Favorite for Gatherings?
This cake is a crowd-pleaser. It serves many people easily, making it perfect for groups. The no-bake nature means less time in the kitchen. Guests love the fun layers and creamy bites. It’s a simple treat that feels special. People often ask for the recipe after trying it. You can find the full recipe and impress your friends!
How Can You Make Icebox Cake Ahead of Time?
Making an Oreo icebox cake ahead is easy and fun. You can save time for parties or gatherings. Start by following the Full Recipe to prepare your cake. After you layer the Oreos and cream filling, cover it well with plastic wrap. This keeps it fresh in the fridge.
What Are the Best Practices for Making It Early?
When making this dessert ahead, plan to chill it overnight. This helps the flavors mix well. The longer it sits, the better it tastes. Also, try to use fresh ingredients. This gives you the best flavor and texture. Avoid using old cream or expired cookies.
How Does Making It Ahead Impact Flavor and Texture?
Making it ahead improves the texture. The cookies soak up moisture and soften nicely. They become almost cake-like. This is key to a great icebox cake. The flavors will blend and become richer. Each bite will taste like a little piece of heaven.
What Should You Keep in Mind for Timing and Serving?
Timing is important when serving this dessert. If you plan to serve it the next day, start the night before. Allow at least four hours to chill, but overnight is best. When it’s time to serve, cut it into squares. Garnish with chocolate shavings or crushed Oreos for extra flair. Enjoy your dessert with friends and family!
Oreo Icebox Cake is a fun, easy dessert that everyone loves. I shared the key ingredients, steps to make it, and tips for perfect assembly. You can even customize it for any gathering. Proper storage helps keep the cake fresh, and many agree it’s a crowd favorite. Remember, making it ahead can boost flavor. Enjoy your tasty creation, and make it a highlight at your next event!